Who doesn’t love a Christmas tree that sparkles with personality and a touch of the sea? DIY Oyster Shell Christmas Trees are becoming a holiday sensation, and for good reason. These eco-friendly masterpieces bring the beauty of the ocean into your home while adding a unique twist to your festive decor. If you’re ready to dive into creativity this season, this project is perfect for you. It’s easy, fun, and sustainable, making it a win-win for both you and Mother Nature.
Imagine this: a shimmering Christmas tree made entirely from discarded oyster shells. Not only does it look stunning, but it also helps reduce waste by giving these shells a second life. It’s like turning trash into treasure—literally. Plus, with a little bit of creativity and some handy tools, you can create a show-stopping piece that will leave your friends and family in awe.
Whether you’re a seasoned crafter or a beginner just dipping your toes into DIY projects, this guide will walk you through everything you need to know to make your very own oyster shell Christmas tree. So grab your glue gun, gather your shells, and let’s get started!
Read also:Ravens Lineman Charged With Dui The Full Story Unveiled
Table of Contents
- What is a DIY Oyster Shell Christmas Tree?
- Why Choose Oyster Shells for Your Christmas Decor?
- Materials You’ll Need
- Step-by-Step Guide to Making Your Tree
- Tips and Tricks for Success
- The Eco-Friendly Benefits of Using Oyster Shells
- Common Questions About DIY Oyster Shell Christmas Trees
- Styling Ideas for Your Shell Tree
- Where to Find Oyster Shells
- Final Thoughts and Inspiration
What is a DIY Oyster Shell Christmas Tree?
Let’s break it down, folks. A DIY Oyster Shell Christmas Tree is basically a Christmas tree made entirely out of—you guessed it—oyster shells. These beauties are crafted by layering the shells in a tree-like shape, creating a structure that’s both festive and full of character. It’s like bringing the ocean vibes to your living room, but with a holiday twist.
Think of it as a way to celebrate the season while also paying homage to the natural world. Oyster shells have an organic texture and a natural shimmer that makes them perfect for this kind of project. Plus, they’re surprisingly easy to work with once you get the hang of it.
Why People Are Obsessed with Shell Christmas Trees
The craze around DIY Oyster Shell Christmas Trees isn’t just about aesthetics. People love them because they’re:
- Eco-Friendly: Reusing oyster shells reduces waste and promotes sustainability.
- Unique: No two trees are alike, thanks to the natural variations in shell shapes and sizes.
- Versatile: You can decorate them with lights, ornaments, or even glitter to match your personal style.
So, if you’re looking for a way to stand out during the holiday season, this might just be the project for you.
Why Choose Oyster Shells for Your Christmas Decor?
Oyster shells are more than just a pretty face—they’re a powerhouse of possibilities when it comes to crafting. Here’s why they’re the perfect material for your DIY Christmas tree:
Read also:Jordans Popularity In Yugoslavia A Deep Dive Into The Phenomenon
First off, oyster shells are super durable. Unlike some other crafting materials, they won’t break or crumble easily, which means your tree will last for years to come. Plus, their natural texture and color give them a rustic charm that’s hard to replicate with synthetic materials.
But the real magic happens when you consider the environmental impact. By repurposing oyster shells, you’re helping to reduce waste and promote sustainability. It’s like giving these shells a second chance to shine, and who doesn’t love a good redemption story?
Environmental Impact
Did you know that millions of oyster shells are discarded every year? Instead of letting them end up in landfills, why not turn them into something beautiful? Crafting with oyster shells is a small but meaningful way to contribute to a healthier planet.
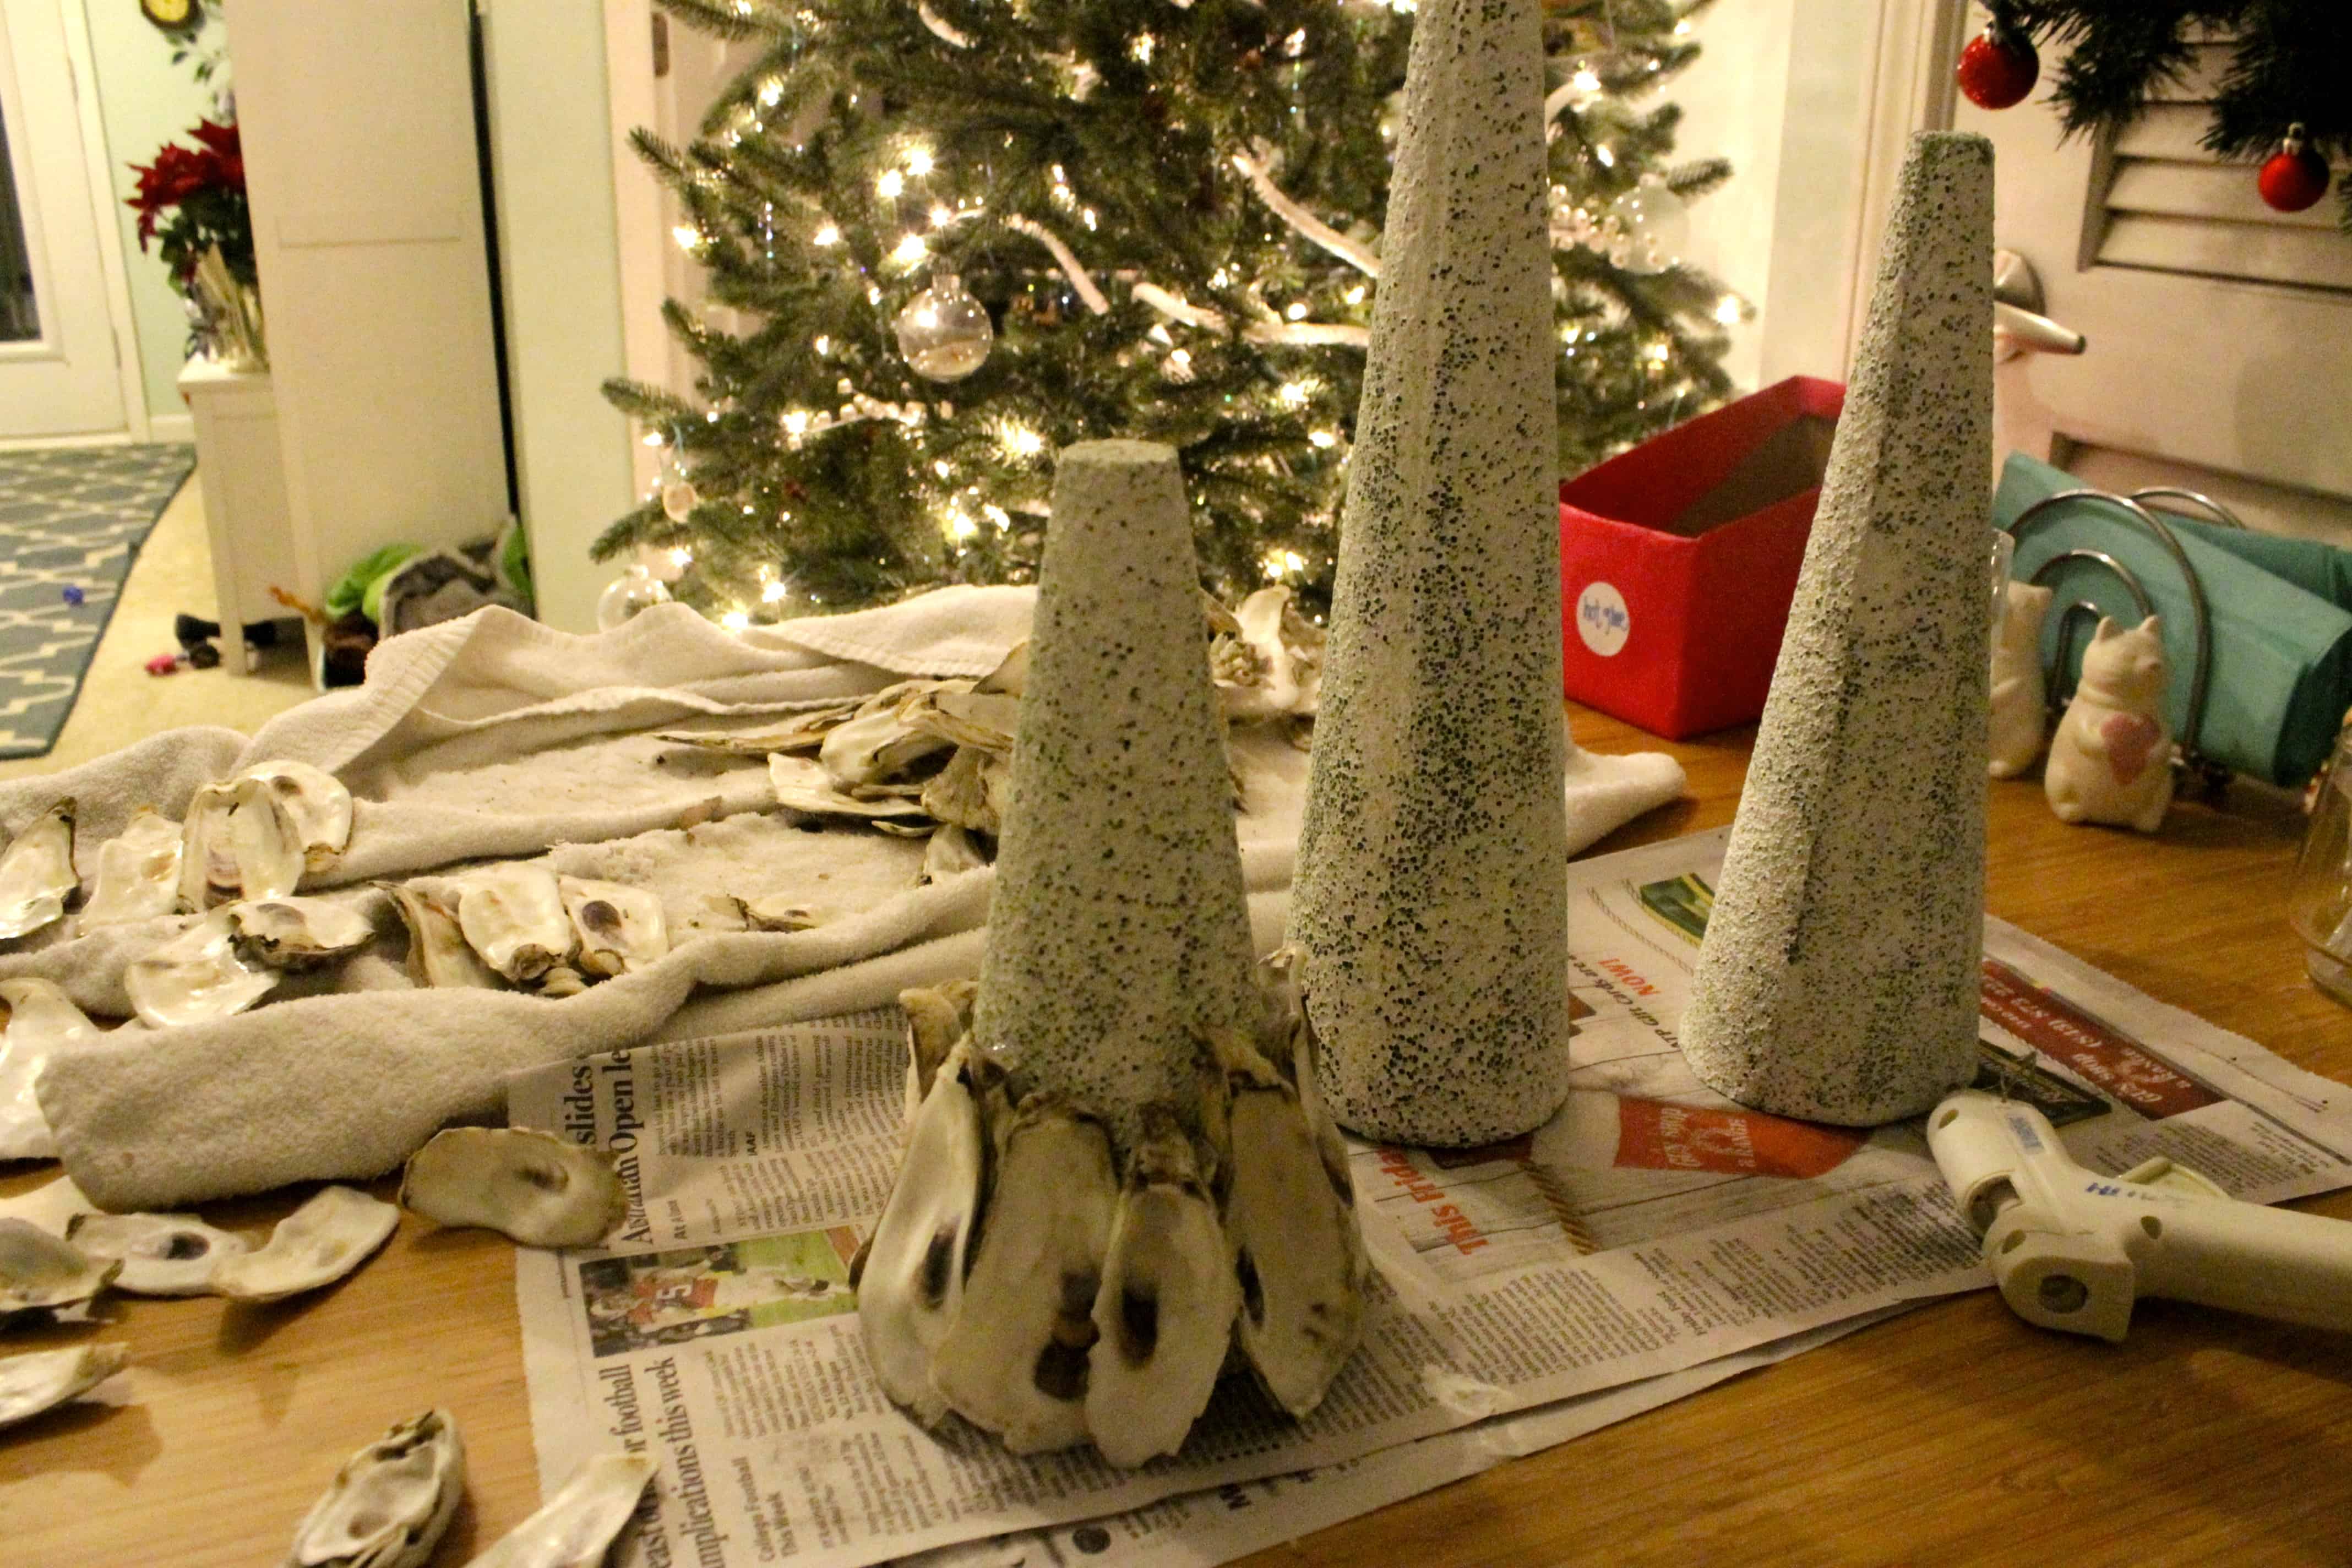
Materials You’ll Need
Now that you’re ready to dive into this project, let’s talk about what you’ll need. Don’t worry—it’s not as complicated as it sounds. Here’s a quick rundown of the materials you’ll require:
- Oyster Shells (lots of ‘em!)
- A strong adhesive (like hot glue or epoxy)
- A foam cone or wooden base to build your tree on
- Decorative items like lights, ribbons, or ornaments (optional)
- Paint or varnish (if you want to customize the look)
And that’s pretty much it! With these basic supplies, you’ll be well on your way to creating a masterpiece.
Where to Get Your Supplies
Most of these items can be found at your local craft store or online. As for the oyster shells, we’ll cover that in more detail later on. For now, focus on gathering everything else so you’re ready to go when the time comes.
Step-by-Step Guide to Making Your Tree
Alright, here’s where the magic happens. Follow these steps, and you’ll have your very own DIY Oyster Shell Christmas Tree in no time:
Step 1: Prepare Your Workspace
Before you start, make sure you have a clean, flat surface to work on. Cover it with newspaper or a drop cloth to protect it from glue spills. Trust me, this will save you a headache later on.
Step 2: Sort Your Shells
Take a few minutes to sort through your oyster shells. Group them by size, shape, and color. This will make the assembly process much easier and help you create a more balanced look.
Step 3: Start Building
Begin by applying a small amount of adhesive to the bottom of each shell and attaching it to the foam cone. Start at the bottom and work your way up, overlapping the shells as you go. Think of it like creating scales on a fish—each shell should fit snugly against the one below it.
Step 4: Add Finishing Touches
Once your tree is complete, it’s time to add those finishing touches. Hang some fairy lights, tie on a ribbon, or sprinkle some glitter for extra sparkle. The possibilities are endless, so feel free to get creative!
Tips and Tricks for Success
Here are a few tips to help you achieve the best results:
- Work in Sections: Instead of trying to cover the entire cone at once, focus on one section at a time. This will give you more control and help prevent mistakes.
- Use Clamps: If you’re worried about the shells falling off, use small clamps to hold them in place until the glue dries.
- Experiment with Patterns: Don’t be afraid to mix up the arrangement of your shells. Try alternating between large and small ones or creating concentric circles for a unique look.
Remember, this is your project, so have fun with it! There’s no right or wrong way to do it, as long as you’re happy with the end result.
The Eco-Friendly Benefits of Using Oyster Shells
Let’s talk about why crafting with oyster shells is such a great idea from an environmental perspective. First of all, oyster shells are 100% biodegradable, meaning they won’t harm the planet when they eventually break down. But that’s not all—using them in crafts also helps reduce the amount of waste that ends up in landfills.
Plus, many communities have programs in place to recycle oyster shells. These programs often crush the shells and use them to restore oyster reefs, which play a vital role in maintaining healthy ecosystems. By crafting with oyster shells, you’re not only creating something beautiful but also supporting these important conservation efforts.
How You Can Help
If you’re feeling inspired to take your eco-friendly efforts even further, consider getting involved with local shell recycling programs. Many restaurants and seafood businesses participate in these initiatives, so it’s a great way to give back to your community while enjoying your favorite seafood dishes.
Common Questions About DIY Oyster Shell Christmas Trees
Got questions? We’ve got answers. Here are some of the most frequently asked questions about DIY Oyster Shell Christmas Trees:
How Long Does It Take to Make One?
The time it takes to complete your tree will depend on several factors, including the size of your tree and how many shells you’re using. On average, most people can finish a medium-sized tree in a few hours. Just be sure to give yourself plenty of time so you don’t feel rushed.
Can I Paint the Shells?
Absolutely! Painting the shells is a great way to customize your tree and add a personal touch. Just make sure to use a paint that’s specifically designed for porous surfaces, and let it dry completely before assembling your tree.
Will the Tree Be Sturdy Enough?
As long as you use a strong adhesive and follow the steps carefully, your tree should be sturdy enough to stand on its own. If you’re worried about stability, consider adding a small weight to the base for extra support.
Styling Ideas for Your Shell Tree
Once your tree is complete, it’s time to think about how to display it. Here are a few ideas to get you started:
- Place it on a side table or mantelpiece for a focal point in your living room.
- Add fairy lights for a warm, glowing effect that’s perfect for the holidays.
- Pair it with other nautical-themed decor for a cohesive look.
Don’t be afraid to mix and match different styles until you find the perfect setup for your space.
Where to Find Oyster Shells
Now, let’s talk about where to get your oyster shells. If you live near the coast, you might be able to collect them yourself from local beaches. Just be sure to check local regulations first, as some areas have restrictions on shell collection.
If you’re not near the coast, don’t worry—you can still get your hands on some shells. Many seafood restaurants and markets sell oyster shells, or you can order them online from specialty suppliers. Just do a quick search, and you’ll find plenty of options.
How Many Shells Do You Need?
The number of shells you’ll need depends on the size of your tree. As a general rule, plan on using about 200-300 shells for a medium-sized tree. If you’re making a larger tree, you’ll need more.
Final Thoughts and Inspiration
There you have it—a complete guide to creating your very own DIY Oyster Shell Christmas Tree. Whether you’re a seasoned crafter or a beginner, this project is sure to bring joy and creativity to your holiday season. Not only will you end up with a stunning piece of decor, but you’ll also be doing your part to help the planet.
So what are you waiting for? Grab your supplies, gather your shells, and let’s get crafting. And don’t forget to share your creations with us—we’d love to see what you come up with!
Happy crafting, and merry holidays!