Let’s be real here folks—camping in your trusty RV or camper van is one of life’s greatest adventures. But what happens when that slide-out roof starts acting up? A faulty slide-out roof can ruin your trip faster than you can say "roadkill." Whether it's leaking, sagging, or just plain refusing to cooperate, knowing how to repair your camper slide-out roof is crucial if you want to keep those weekend getaways stress-free.
Listen up, campers. This isn’t just about patching up a leak or tightening a screw. It’s about keeping your rig in top shape so you can focus on enjoying the great outdoors instead of worrying about your roof collapsing mid-road trip. And hey, who doesn’t love saving a buck or two by doing it yourself?
We’ve all been there—sitting around the campfire, sipping coffee, and wondering why your roof repair costs are skyrocketing. But fear not, because this guide is here to change the game. From identifying common issues to step-by-step repair solutions, we’ve got you covered. So grab your toolkit, pour yourself a cold one, and let’s dive into the world of camper slide-out roof repair!
Read also:Woman Drowns Dog At Airport The Shocking Incident That Left Everyone Speechless
Understanding the Importance of Camper Slide Out Roof Repair
Okay, let’s get one thing straight—your camper’s slide-out roof isn’t just a piece of metal sitting on top of your rig. It’s a critical component that keeps the rain out, the critters away, and your peace of mind intact. Neglecting roof repairs can lead to bigger problems down the road, like water damage, mold, and structural issues that’ll cost you an arm and a leg.
Think about it: a leaking roof can damage your interior, ruin your furniture, and even compromise the structural integrity of your camper. Not to mention the inconvenience of having to deal with wet bedding or soggy floors during a much-needed escape from reality. That’s why understanding the importance of regular maintenance and timely repairs is key to keeping your rig in tip-top shape.
And here’s the kicker—most roof issues can be fixed with a little know-how and the right tools. You don’t need to be a mechanic or a roofing expert to tackle these repairs. With the right guidance, you can save yourself time, money, and a whole lot of hassle.
Common Issues with Camper Slide Out Roofs
Alright, let’s break it down. What are some of the most common problems you might encounter with your camper’s slide-out roof? From leaks to sagging, here’s a quick rundown of the usual suspects:
- Leaks: One of the biggest complaints among RV owners is roof leaks. These can be caused by damaged seals, improperly installed vents, or worn-out roofing materials.
- Sagging: Over time, the structural integrity of your roof can weaken, leading to sagging or uneven surfaces. This is often due to poor maintenance or excessive weight.
- Cracks and Damage: Whether it’s from hail, tree branches, or general wear and tear, cracks and damage to your roof can compromise its ability to keep the elements out.
- Improper Sealing: Seals around vents, skylights, and slide-out components can degrade over time, leading to water intrusion and other issues.
Recognizing these issues early on can save you a ton of trouble in the long run. So next time you’re out camping, take a good look at your roof and see if anything looks off. Catching problems early is half the battle.
Tools and Materials You’ll Need for Camper Slide Out Roof Repair
Before you dive headfirst into a roof repair project, it’s important to have the right tools and materials on hand. Here’s a list of essentials you’ll need to tackle most common issues:
Read also:Elon Musks Controversial Rant Sparks Debate A Deep Dive Into The Tech Titans Explosive Remarks
- Roofing Sealant: A high-quality sealant designed for RVs and campers is essential for sealing cracks, leaks, and gaps.
- Roof Coating: A good rubber roof coating can protect your roof from UV damage, weathering, and general wear and tear.
- Replacement Parts: Depending on the issue, you might need new vents, skylights, or other components.
- Brushes and Scrapers: For cleaning and prepping your roof before applying sealant or coating.
- Safety Gear: Don’t forget gloves, goggles, and a sturdy ladder to keep you safe while working on your roof.
Having the right tools and materials will make your repair job smoother, faster, and more effective. Plus, it’ll give you that satisfying DIY成就感 when you’re done.
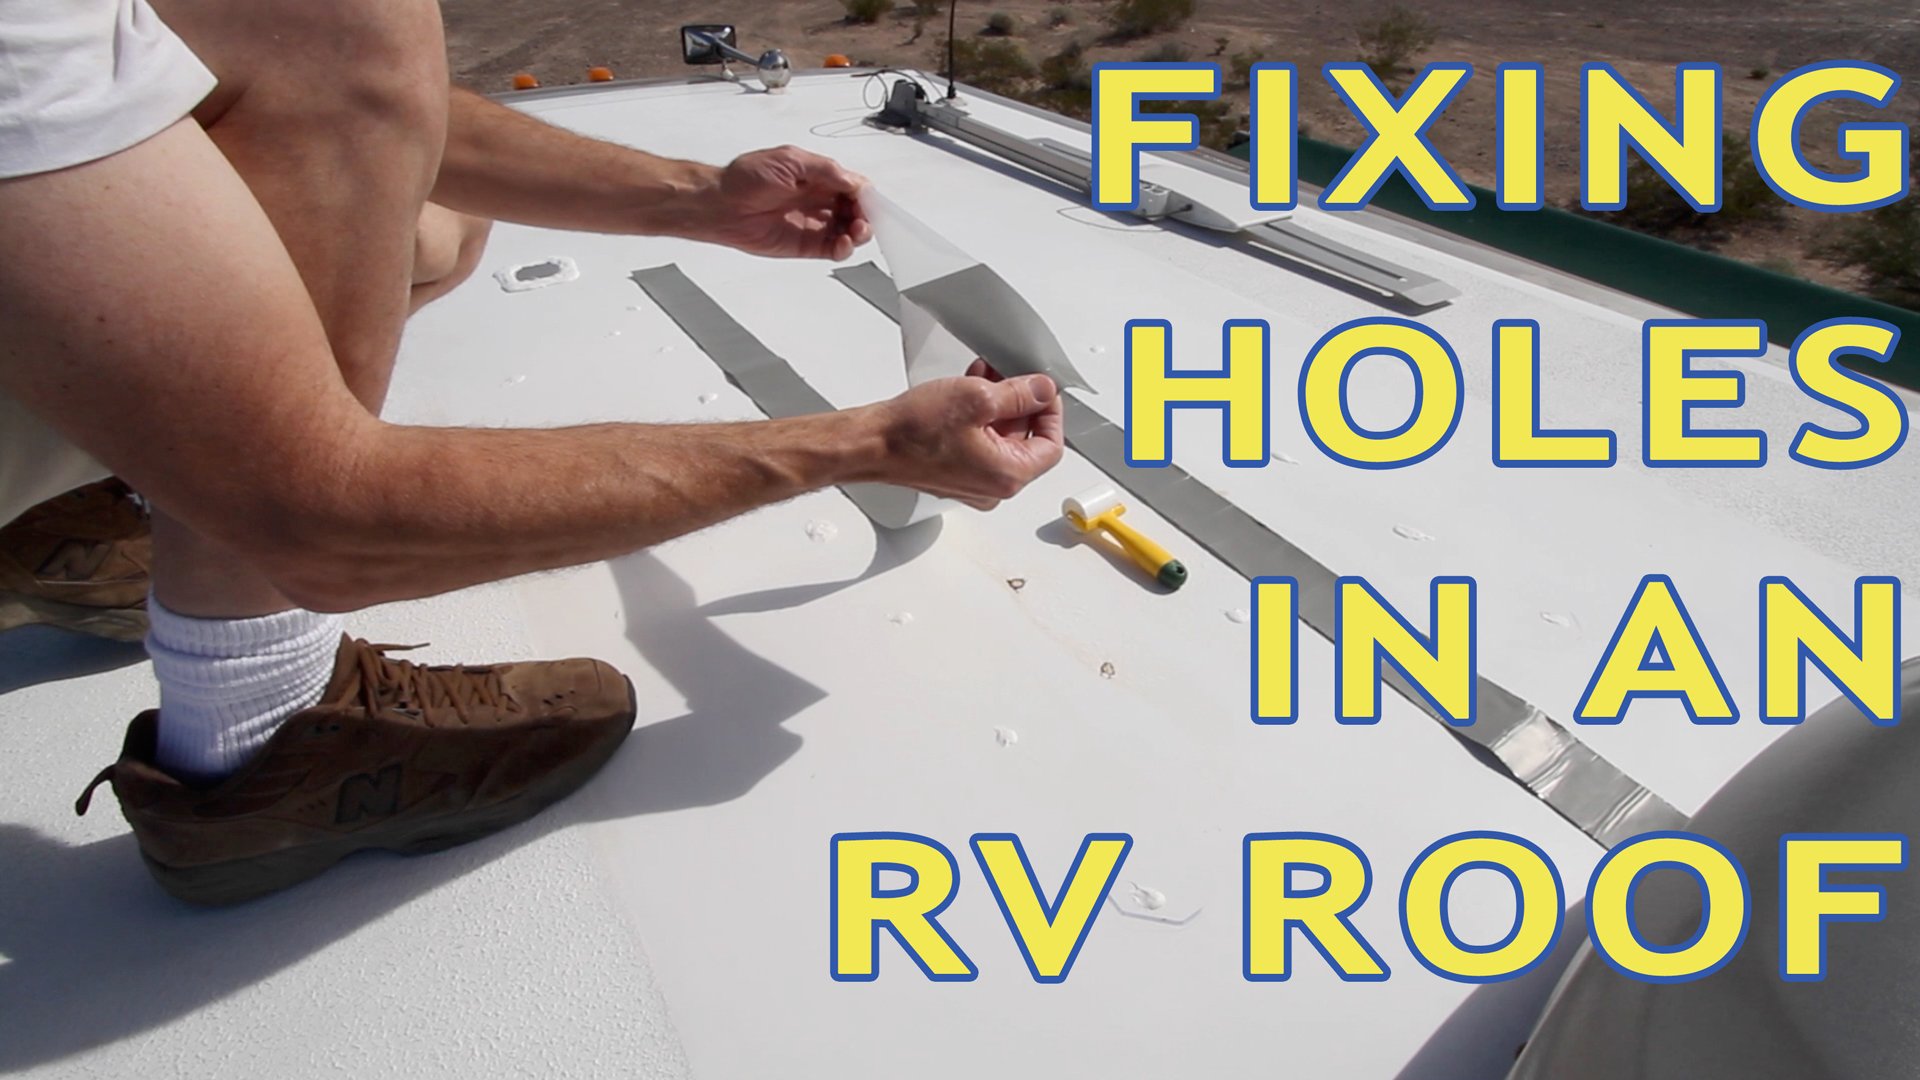
Step-by-Step Guide to Repairing Your Camper Slide Out Roof
Identifying the Problem
The first step in any repair job is figuring out exactly what’s wrong. Take a close look at your roof and identify any leaks, cracks, or other issues. Don’t be afraid to get your hands dirty—sometimes you need to poke around a bit to find the source of the problem.
Cleaning and Prepping the Roof
Once you’ve identified the issue, it’s time to clean and prep your roof. Remove any dirt, debris, or old sealant using a brush or scraper. A clean surface is crucial for ensuring that your sealant or coating adheres properly.
Applying Sealant and Coating
Now comes the fun part—applying the sealant or coating. Follow the manufacturer’s instructions carefully, and make sure to cover all affected areas thoroughly. Don’t skimp on the sealant—better safe than sorry, right?
Testing the Repair
After your sealant or coating has dried, it’s time to test your repair. Turn on the sprinklers, grab a hose, or wait for the next rainstorm to see if your fix holds up. If everything looks good, congratulations—you’ve just saved yourself a ton of money and hassle!
DIY vs. Professional Repair: Which is Right for You?
Let’s face it—not everyone is cut out for DIY repairs. Some folks prefer to leave it to the professionals, and that’s totally okay. But if you’re the type who loves getting their hands dirty and saving a buck or two, tackling a camper slide-out roof repair can be a rewarding experience.
Here’s a quick breakdown of the pros and cons of each approach:
- DIY: Pros—Cost-effective, rewarding, and you learn a new skill. Cons—Can be time-consuming and requires some know-how.
- Professional: Pros—Guaranteed results, saves time, and no risk of messing it up. Cons—Can be expensive and you miss out on the learning experience.
Ultimately, the choice is yours. Just remember—if you’re going the DIY route, don’t hesitate to reach out for advice or guidance when needed.
Preventive Maintenance Tips for Camper Slide Out Roofs
Prevention is the best medicine, folks. Regular maintenance can go a long way in extending the life of your camper’s slide-out roof and preventing costly repairs down the line. Here are a few tips to keep your roof in top condition:
- Inspect Regularly: Take a look at your roof every few months, especially after long trips or severe weather.
- Clean and Seal: Apply a fresh coat of sealant or roofing material as needed to keep your roof protected.
- Remove Snow and Debris: Don’t let snow, leaves, or other debris accumulate on your roof—it can cause damage over time.
- Check Seals and Components: Make sure all seals, vents, and components are in good working order and replace them as needed.
A little effort now can save you a lot of trouble later. Trust me, your future self will thank you for it.
Cost Considerations for Camper Slide Out Roof Repair
Let’s talk money, shall we? The cost of repairing your camper’s slide-out roof can vary depending on the severity of the issue and whether you choose to DIY or hire a professional. Here’s a rough estimate of what you might expect to pay:
- DIY Materials: $50-$200 for sealant, coating, and other materials.
- Professional Repair: $500-$2,000 or more, depending on the extent of the damage.
As you can see, going the DIY route can save you a significant amount of money. But remember, if the repair is beyond your skill level, it’s better to bite the bullet and hire a pro than risk making the problem worse.
Expert Advice from Camper Enthusiasts
We reached out to some seasoned camper enthusiasts and RV mechanics to get their take on slide-out roof repairs. Here’s what they had to say:
“The key to a successful roof repair is preparation. Make sure you’ve got the right tools and materials, and don’t rush the process. Take your time, and you’ll get great results.”
“Regular maintenance is key. If you catch issues early, they’re much easier and cheaper to fix. Don’t wait until it’s too late!”
Listening to experts in the field can provide valuable insights and help you avoid common pitfalls. So don’t be afraid to ask for advice or share your own experiences with others.
Final Thoughts and Call to Action
There you have it—your ultimate guide to camper slide-out roof repair. Whether you’re a seasoned DIYer or just starting out, tackling roof repairs can be a rewarding experience that saves you time and money in the long run.
So what are you waiting for? Grab your toolkit, roll up your sleeves, and get to work. And don’t forget to share your experiences with us in the comments below. We’d love to hear about your successes (and maybe even your failures—it’s all part of the learning process, right?).
Until next time, happy camping and safe travels!
Table of Contents
- Understanding the Importance of Camper Slide Out Roof Repair
- Common Issues with Camper Slide Out Roofs
- Tools and Materials You’ll Need for Camper Slide Out Roof Repair
- Step-by-Step Guide to Repairing Your Camper Slide Out Roof
- DIY vs. Professional Repair: Which is Right for You?
- Preventive Maintenance Tips for Camper Slide Out Roofs
- Cost Considerations for Camper Slide Out Roof Repair
- Expert Advice from Camper Enthusiasts
- Final Thoughts and Call to Action