Let’s talk about the holy grail of dips—artichoke and asiago cheese dip. Whether you’re hosting a party, enjoying game night with friends, or just craving something cheesy and delicious, this dip is your go-to solution. It’s creamy, savory, and packed with flavor that will leave your taste buds begging for more.
Now, before we dive into the nitty-gritty of this heavenly creation, let me tell you why this dip has become a staple in many households. Imagine a warm, gooey mixture of artichoke hearts, creamy asiago cheese, and a hint of garlic. Sounds irresistible, right? Well, it is. And guess what? It’s super easy to make, too. So, whether you’re a seasoned chef or someone who can barely boil water, this recipe is for you.
But why stop at just making it? Understanding the science behind the flavors, the best serving suggestions, and even some creative twists can take your artichoke and asiago cheese dip game to the next level. Stick around, and I’ll walk you through everything you need to know to become the ultimate dip master. Trust me, your friends will be impressed!
Read also:Tangmo Nida The Remarkable Life And Legacy Of Thailands Beloved Star
Before we get started, here’s a quick table of contents to help you navigate through this cheesy journey:
- The History of Artichoke and Asiago Cheese Dip
- Key Ingredients You Need
- How to Make the Perfect Dip
- Creative Variations to Try
- Best Pairings for Your Dip
- Is It Healthy?
- Tips for Storing Your Dip
- Frequently Asked Questions
- Pro Tips for Making the Best Dip
- Final Thoughts
The History of Artichoke and Asiago Cheese Dip
Let’s rewind the clock a bit and explore where this delicious dip originated. While the exact origins of artichoke and asiago cheese dip might be a bit murky, one thing is for sure—it’s a modern classic that’s taken the culinary world by storm. The combination of artichokes and cheese has been around for centuries, but it wasn’t until the 1980s that this specific dip started gaining popularity in the United States.
Why the 80s, you ask? Well, during this decade, there was a surge in interest in Mediterranean and Italian cuisines. Chefs and home cooks alike began experimenting with new flavors, and the artichoke and asiago cheese dip was born. It’s a fusion of Italian-inspired ingredients, and its popularity has only grown since then.
But here’s the kicker—asiago cheese, which is the star of this dip, has been around for way longer. Originating from the Asiago plateau in Italy, this cheese has been a staple in Italian kitchens for centuries. Its nutty, slightly sweet flavor pairs perfectly with the earthy taste of artichokes, creating a match made in heaven.
Key Ingredients You Need
Now that you know a little bit about the history, let’s talk about what goes into making this dip. Here’s a list of the key ingredients you’ll need:
- Artichoke hearts—canned or frozen work just fine
- Asiago cheese—shredded or grated
- Mayonnaise—adds that creamy texture
- Sour cream—keeps it light and tangy
- Garlic—fresh or powdered, your choice
- Parmesan cheese—optional, but highly recommended
- Red pepper flakes—for a little kick
- Green onions—adds a pop of color and flavor
Pro tip: Don’t skimp on the quality of your ingredients. A good block of asiago cheese can make all the difference in the taste of your dip. And if you’re feeling adventurous, you can even experiment with different types of cheese, like feta or goat cheese.
Read also:Rainbow Six Siege X A Tactical Shooter That Demands Skill Strategy And Teamwork
Where to Buy the Best Ingredients
When it comes to sourcing your ingredients, you have a few options. Your local grocery store should have everything you need, but if you’re looking for premium asiago cheese, consider checking out a specialty cheese shop or your favorite farmer’s market. Trust me, the flavor difference is worth it.
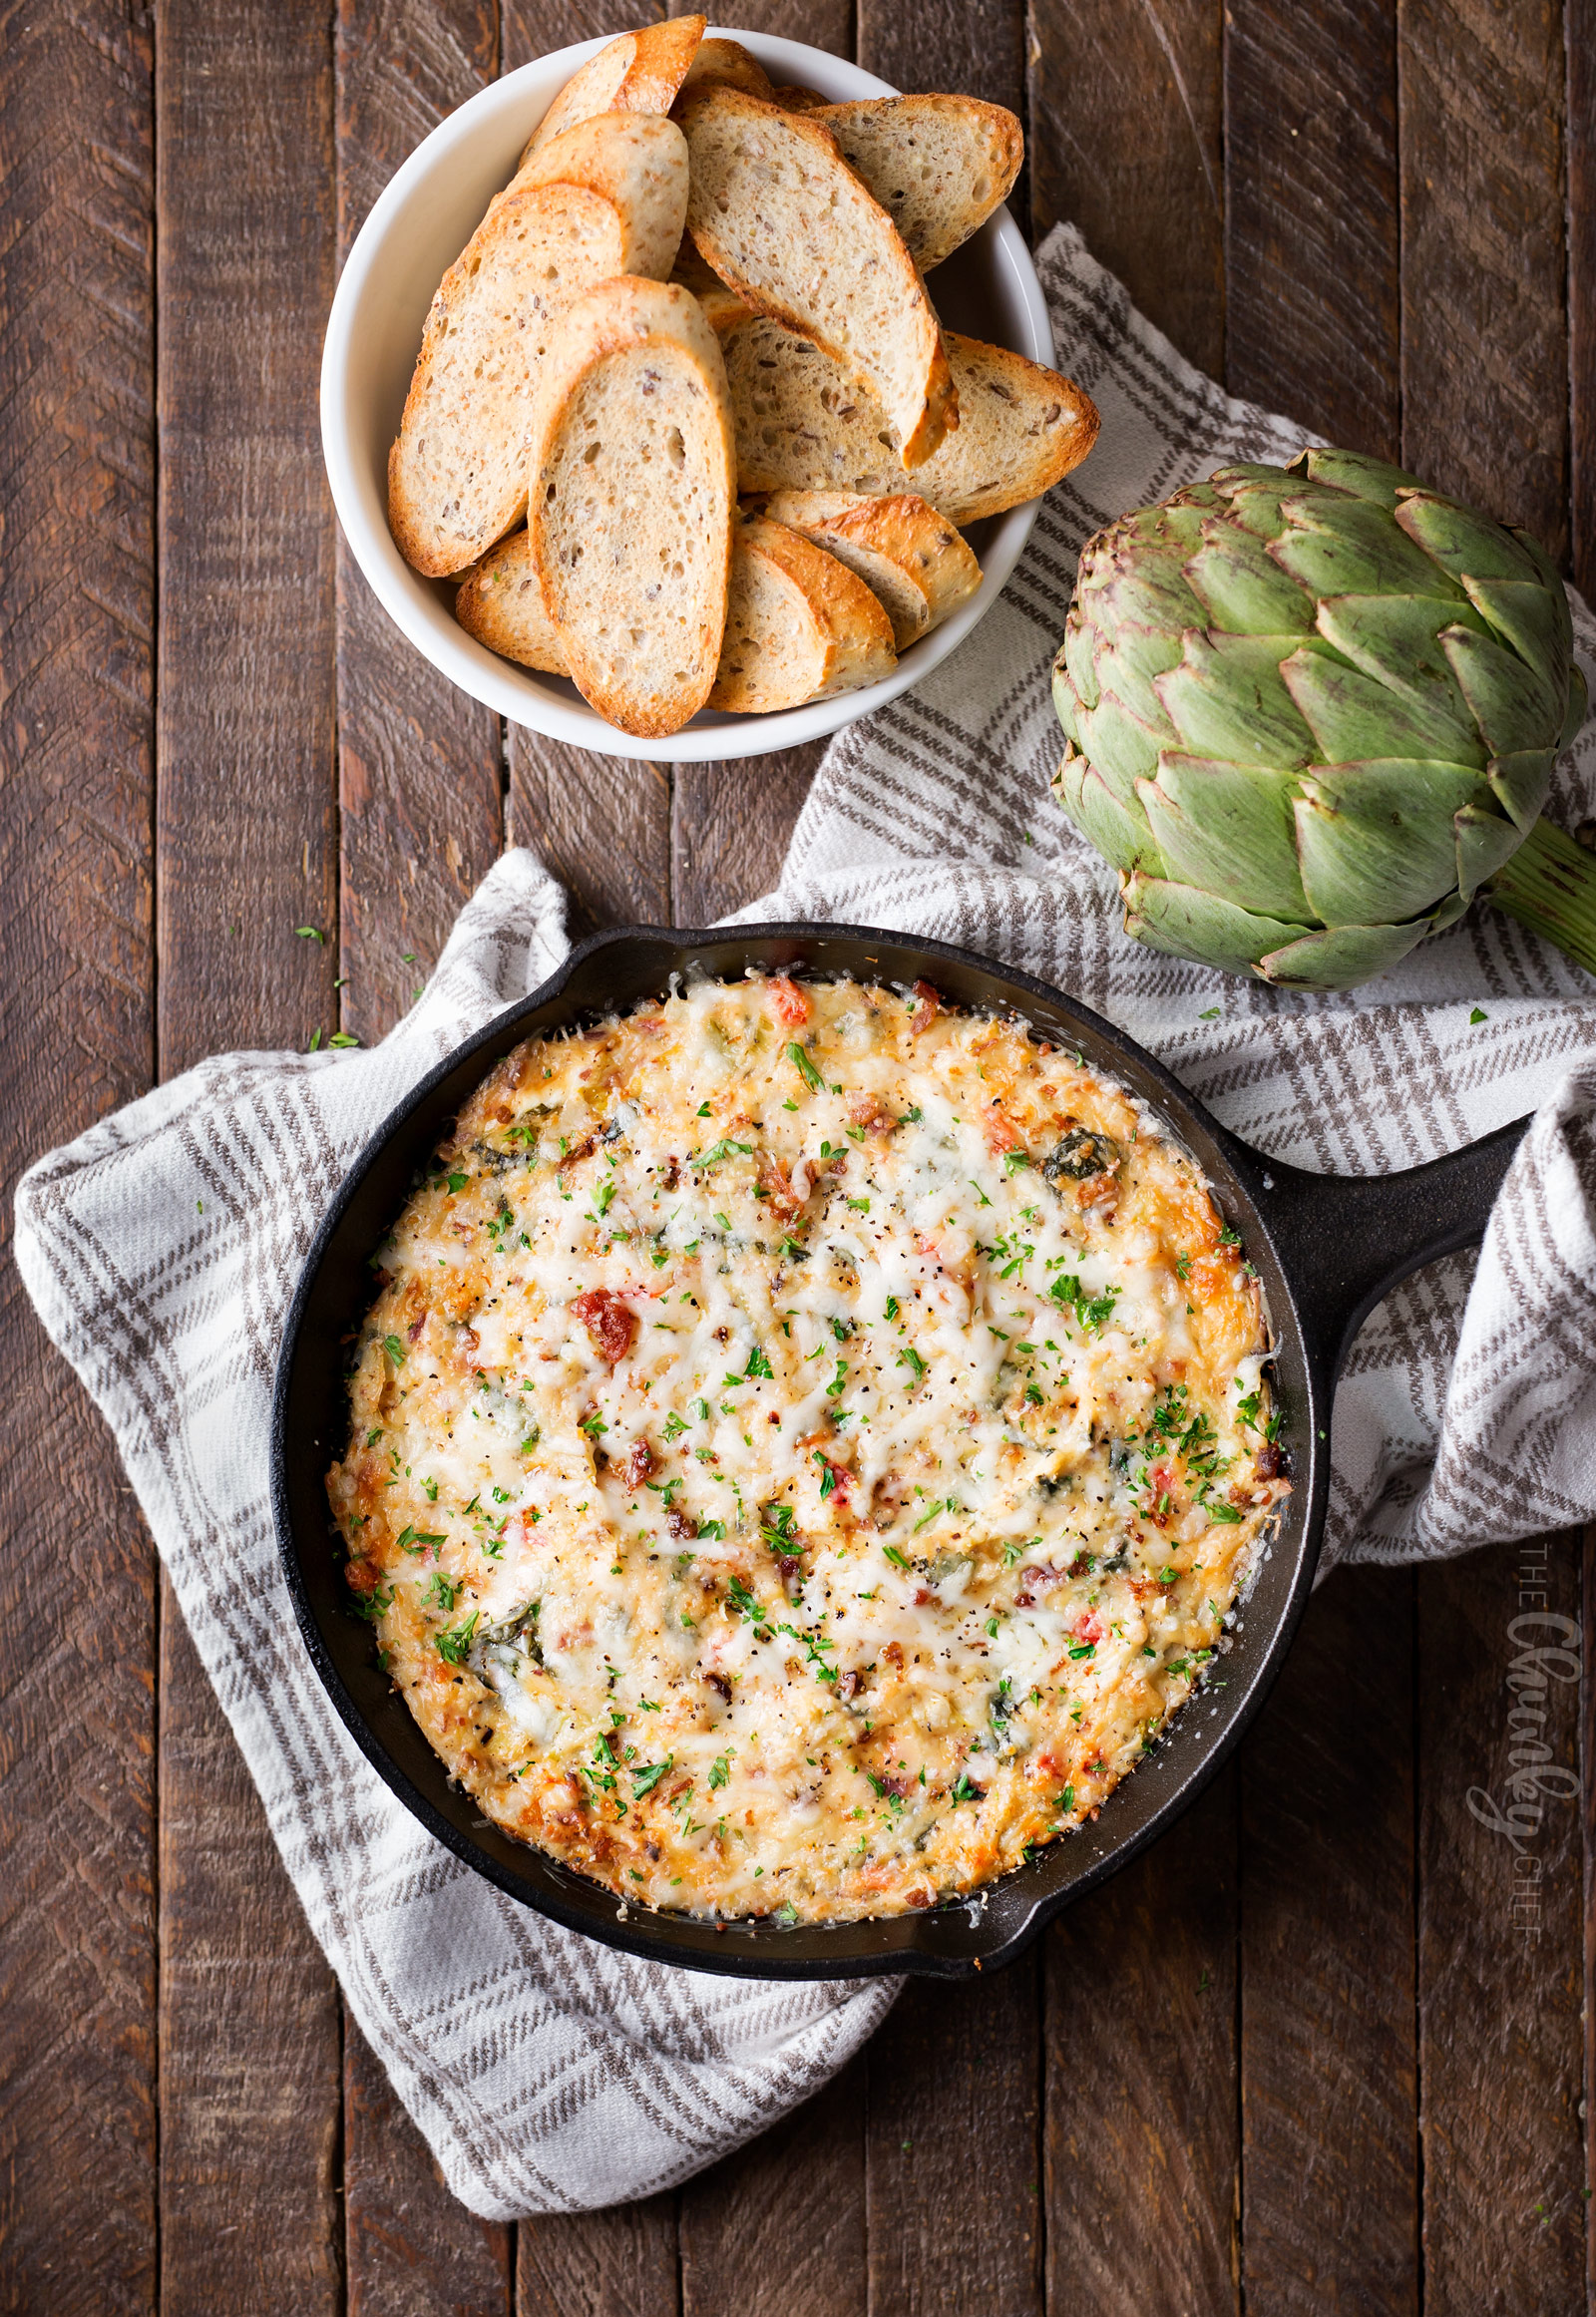
How to Make the Perfect Dip
Alright, let’s get down to business. Here’s a step-by-step guide to making the perfect artichoke and asiago cheese dip:
Step 1: Preheat your oven to 350°F (175°C). You want to make sure everything gets nice and warm.
Step 2: In a mixing bowl, combine your artichoke hearts, mayonnaise, sour cream, grated asiago cheese, and garlic. Mix it all together until it’s smooth and creamy.
Step 3: Add in the parmesan cheese, red pepper flakes, and green onions. Give it another good stir to make sure everything’s evenly distributed.
Step 4: Transfer the mixture to a baking dish. You can use a small casserole dish or even a deep pie plate.
Step 5: Bake in the oven for about 20-25 minutes, or until the top is golden brown and bubbly. If you want an extra crispy top, you can broil it for a minute or two at the end.
Step 6: Let it cool for a few minutes before serving. Trust me, no one wants to burn their mouth on melted cheese, no matter how good it smells!
Tips for Perfect Baking
One thing to keep in mind is that baking times can vary depending on your oven. If you’re using a smaller dish, it might cook faster. Always keep an eye on it to make sure it doesn’t burn. And remember, patience is key—letting it cool for a few minutes will make the cheese set and make it easier to scoop.
Creative Variations to Try
Now that you’ve got the basics down, why not experiment with some variations? Here are a few ideas to spice things up:
- Add some sun-dried tomatoes for a burst of flavor.
- Swap out the asiago cheese for feta or goat cheese for a tangier twist.
- Throw in some chopped spinach for an extra nutritional boost.
- Use cream cheese instead of sour cream for a richer texture.
Remember, the beauty of cooking is in the experimentation. Don’t be afraid to try new things and make the recipe your own!
Why Experiment?
Experimenting with recipes not only keeps things interesting but also helps you discover new flavor combinations that you might love. Plus, it’s a great way to use up ingredients you already have in your pantry.
Best Pairings for Your Dip
Now that you’ve made your dip, what’s the best way to serve it? Here are some ideas:
- Pita chips—perfect for scooping up every last bit of cheese.
- Baguette slices—adds a nice crunch and pairs well with the creamy dip.
- Carrot sticks or celery—healthy and delicious.
- Tortilla chips—great for a Mexican-inspired twist.
And let’s not forget the drinks! A nice cold beer or a glass of white wine pairs perfectly with this dip. If you’re feeling fancy, try a sparkling cider for a refreshing twist.
Why Pairing Matters
The right pairing can elevate your dip from good to great. Think about the textures and flavors you want to complement the dip. A crisp baguette slice, for example, can add a nice contrast to the creamy cheese.
Is It Healthy?
Let’s talk about the elephant in the room—how healthy is this dip? While it’s not exactly a salad, there are ways to make it a bit healthier. Using low-fat sour cream or mayonnaise can cut down on calories without sacrificing flavor. And adding veggies like spinach or artichoke hearts can boost the nutritional value.
But let’s be real—sometimes you just want to indulge. And that’s okay! Moderation is key, and enjoying this dip in small portions can be part of a balanced diet.
Nutritional Breakdown
Here’s a rough estimate of the nutritional content per serving (assuming 8 servings):
- Calories: 200-250
- Fat: 15-20g
- Carbs: 10-15g
- Protein: 8-10g
Of course, this can vary depending on the specific ingredients you use.
Tips for Storing Your Dip
So, what do you do if you have leftovers? Don’t worry, this dip keeps well in the fridge for up to 3-4 days. Just make sure to store it in an airtight container. When you’re ready to reheat it, pop it back in the oven for a few minutes to get it nice and warm again.
Freezing is also an option, but keep in mind that the texture might change slightly after thawing. If you do freeze it, make sure to label it with the date so you can keep track.
Reheating Tips
When reheating, add a splash of milk or cream to help maintain the creamy texture. And always stir it well to make sure everything’s evenly heated.
Frequently Asked Questions
Q: Can I make this dip ahead of time?
A: Absolutely! You can prepare it a day in advance and store it in the fridge until you’re ready to bake it.
Q: What if I don’t have asiago cheese?
A: You can substitute it with another hard cheese like parmesan or romano. Just keep in mind that the flavor might be slightly different.
Q: Is this dip gluten-free?
A: Yes, as long as you use gluten-free pita chips or veggies for dipping, this dip is naturally gluten-free.
Pro Tips for Making the Best Dip
Here are a few final tips to help you make the best artichoke and asiago cheese dip:
- Use fresh garlic instead of powdered for a stronger flavor.
- Don’t overbake it—keep an eye on it to avoid burning.
- Add a sprinkle of paprika on top for a pop of color and flavor.
Remember, practice makes perfect. The more you make this dip, the better you’ll get at tweaking the recipe to suit your taste.
Final Thoughts
There you have it—the ultimate guide to artichoke and asiago cheese dip. From its history to the best ways to serve it, I hope this article has given you all the information you need to become a dip-making pro. Whether you’re hosting a party or just craving something cheesy and delicious, this dip is sure to be a hit.
So, what are you waiting for? Get in the kitchen and start creating your own masterpiece. And don’t forget to share your creations with your friends and family. Who knows? You might just start a new tradition!
And remember, if you have any questions or want to share your own tips, drop a comment below. I’d love to hear from you! Happy dipping, folks!